 I’d like to begin this guide by fully disclosing that I was never really taught how to paint with a palette knife. I didn’t learn it in any of the bazillions (it seems) of formal, extra-curricular art classes I’ve taken since I started taking them when I was about 13. I didn’t learn it at art school proper, where we were told that palette knives were for mixing paint, and that you would wreck your brushes if you used them for this purpose. And yet I’ve done two entire shows featuring palette knife painting (not counting a third ‘sort of solo show’ #itscomplicated) plus another with a couple of pieces done the same way)—along with the few odd pieces for group shows. I can’t help it—palette knife painting is insanely addicting. So it’s on the basis of that that I’d like to share what I’ve learnt over the thirty odd years I’ve been ‘playing with knives’. On top of maybe sparing you a learning curve (although there’s a lot of fun that can be had in that), I’m hoping you might find the same intense enjoyment in this particularly tactile, energetic and expressive method of painting. So to sort of follow up on the Quick-Start Beginner’s Guide to Oil Painting I made for my students last summer, this is a very informal, loosely written quick-start guide to painting with a palette knife. (Which actually is more like a slow, rambling love story between me and palette knife painting.) Such as it is, this guide will be covering
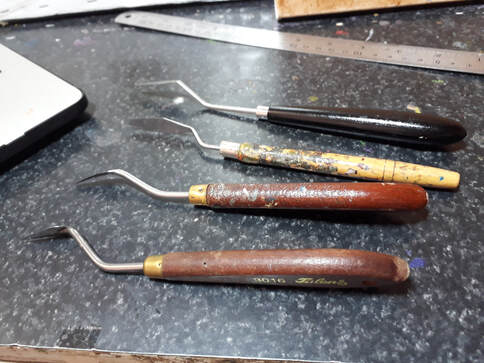
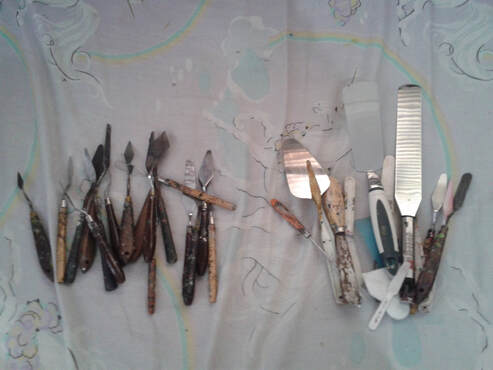
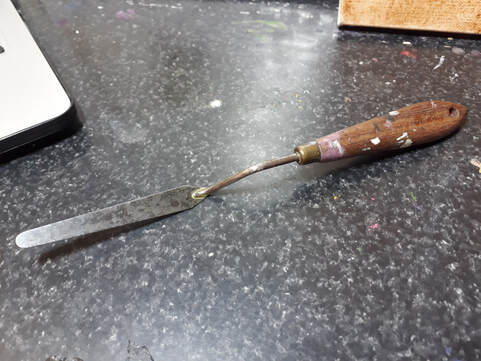
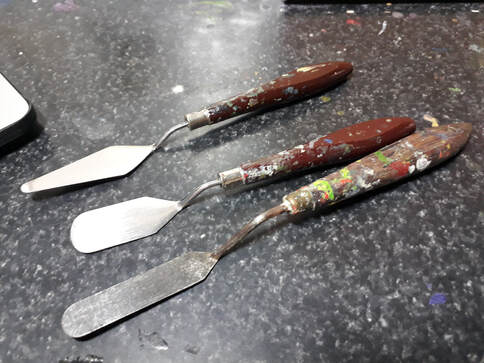
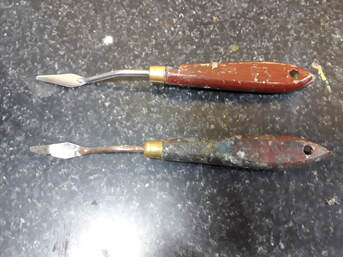
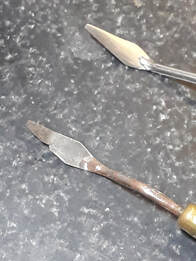
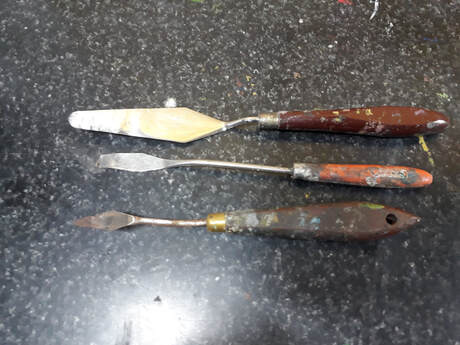
Quite a number of the terms I’ll be using, I made up, mainly because (as I’ve said) I never attended any real ‘How to Paint with a Palette Knife’ classes. I’ll be sure to let you know which terms are mine, though. Thank you, Mr Kelly. But before I go further, I’d like to acknowledge (admit?) the ‘real honest’ (is there a ‘fake honest’? XD) truth: it was Gene Kelly who taught me how to paint with palette knives. No, I’m serious—I grew up on Singin’ in the Rain and An American in Paris, and my first real crush at the tender age of five aside from Steve of Voltes V was Gene Kelly. (I told you it was a love story LOL.) Ironically, I first saw Gene as an old man dancing at his own tribute. So I was actually rather shocked when I saw him young for the first time dancing with that rat in Anchors Aweigh XD But I digress—point is I saw Gene cramming for his show in American in Paris. He used a palette knife about an hour and 13 into the film for a grand total of about three to five seconds all told. Sounds ‘yeah right’ and hokey AF but I never forgot it. ‘Baby’s First Knives’So when I got my first set of knives when I was about 15, I couldn’t wait to ‘make like Gene’. I still have those knives, by the way, and I still use them: 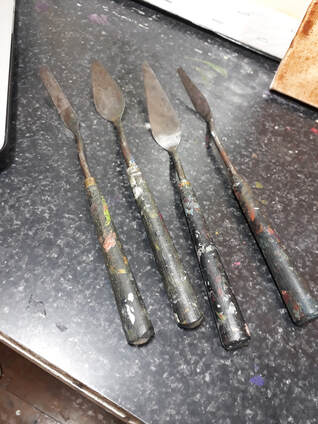 They’re Japanese (Nouvel), very good quality, except they kinda rusted on me, as you can see, but this doesn’t affect the paint or my painting one bit (at least, not in any way I can see anyway). I love them especially because of the way the neck of the knife (what I call that part between the blade proper and the handle) joins the blade seamlessly, making it easier to clean. See if you look at this knife / a lot of knives, there’s a joint— See the difference when you put the ‘jointy’ and the ‘seamless’ ones side by side?
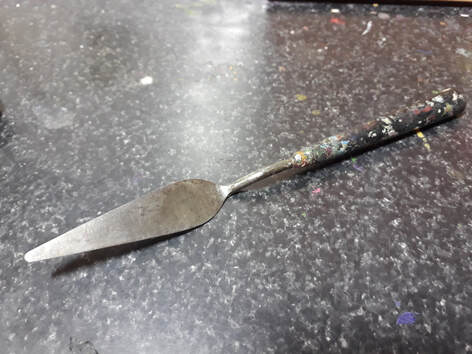
The problem I have with that joint is that the paint gets stuck between or around that joint and you can never really clean it thoroughly. At least I can’t, anyway, even when I soak my knives (which is probably why they rusted LOL (but they’re easier to clean, thus (read: jill is lazy). This is a big deal for me since I can get kinda OC ^^; I’ll talk about cleaning and stuff a little more later on. Palette Knife AnatomyHaving mentioned ‘necks’ and ‘joints’, I figure it might be helpful to put a little diagram here pointing out the basic parts of a palette knife (as jillamonsters call them) which might be referred to throughout the rest of the blog: 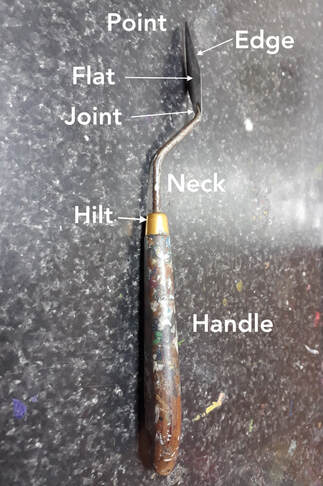 So you’ll see it’s reminiscent of sword parts (as I’ve learned them reading the kind of books I did growing up ^^), which I hope you’ll excuse (not having known better). Picking Out Palette KnivesNow as you can see, palette knives come in all shapes and sizes—which is another thing I love about them, although not that brushes don’t come in all shapes and sizes, either. I’m always on the look out for new (to me) shaped knives; if I find one (and I happen to be liquid) I’ll buy it on the spot. 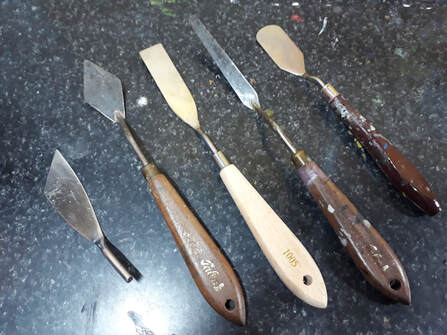 That’s what made me buy the blade on the far left—when it still had a handle, that is. I admit I was rather um, suspiciously surprised it was so cheap (60 bucks (about USD1.15). I usually have to pay through the nose (1 or 2 grand even) to buy a knife, so I knew something had to be up. 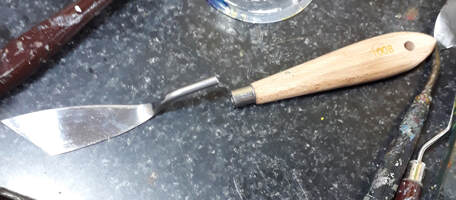 Sure enough, it didn’t take an hour for me to wreck that knife (hence the state it’s in in the photo). It started to wiggle in the handle while I was using it, and sure enough the neck came right out. Welp! Lesson learned for jill—if it’s too cheap to be true, it probably is, lol. This doesn’t automatically mean, however, that just because a knife costs less, doesn’t mean it’s less good. Check out these beauties which I got from one of my teachers who’d brought them over from India—I don’t remember breaking the bank for them, that was some 20 years ago and I still can’t live without them. 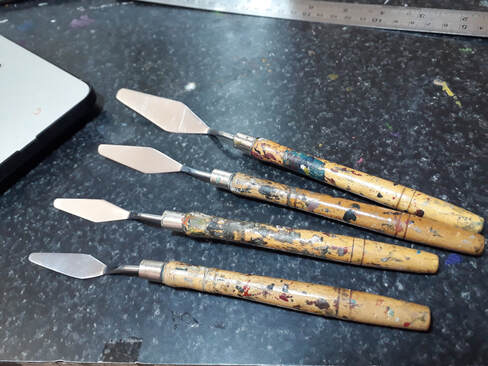 |

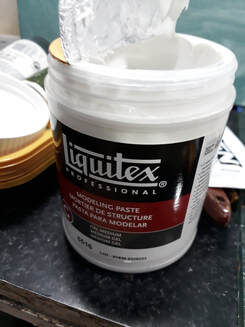 | 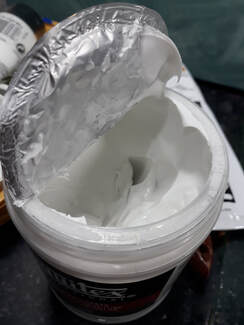 |
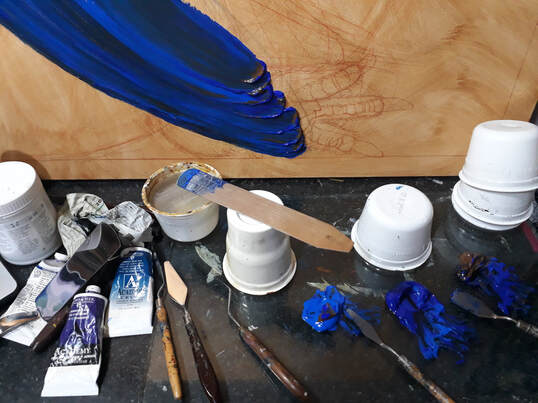
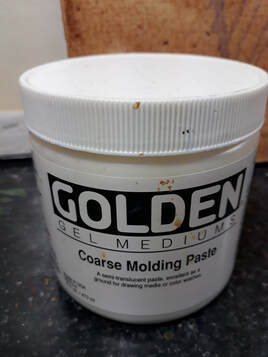
There are different kinds of modelling paste; some are thicker or rougher than others like this coarse grain variety here:
 | 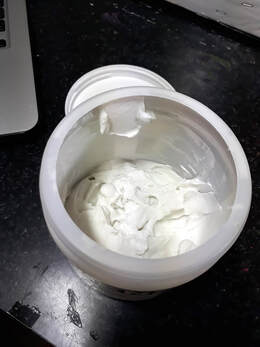 |
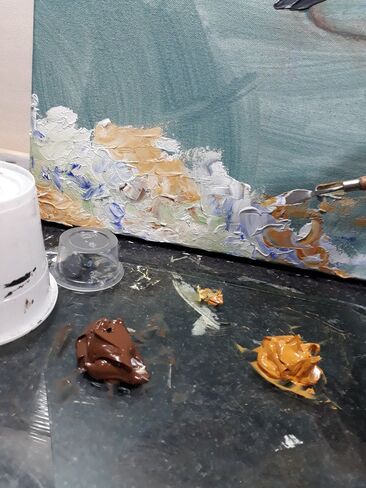
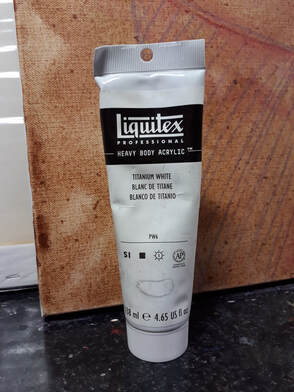
I never really learned how much ‘you’re supposed’ to mix in with the paint; for me, I like to make sure there’s more paint than paste in my mix—but again, I figure the consistency is up to you.
Make sure you mix the paste and paint thoroughly; there might be bits of paste peeking out somewhere.
In a way, I guess you might even use paste as a sort of extender (although it would probably be cheaper to just buy more paint if that was what you wanted to use it for).
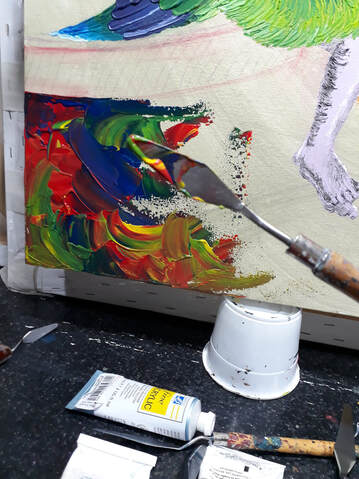
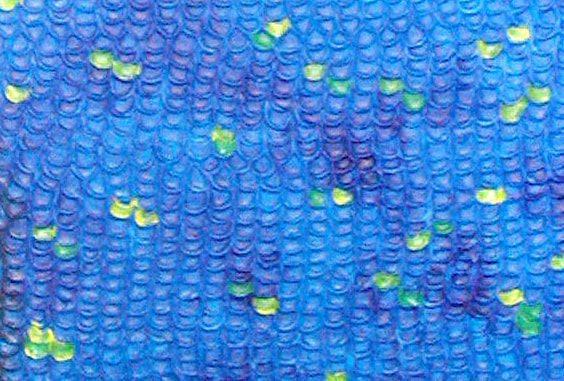
In any case, the nice thing about modelling paste is you can use it to texture your ground on its own, without mixing it with anything. You can use a brush to paint on top of it (with oil as well as acrylic) after it dries like how I did this:
In a way, I guess you might even use paste as a sort of extender (although it would probably be cheaper to just buy more paint if that was what you wanted to use it for).
In any case, the nice thing about modelling paste is you can use it to texture your ground on its own, without mixing it with anything. You can use a brush to paint on top of it (with oil as well as acrylic) after it dries like how I did this:
Now the thing about modelling paste is it kind of dries matte; if you wanted your colours to stay shiny and juicy, you might try using gel medium:
 |  |
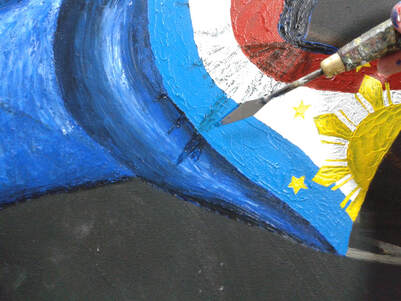
So in the detail below, I used gel medium and that Zwilling JA Henckels icing knife. Now, as far as I know (which isn’t very far), people don’t usually use gel on its own for texturing surfaces like you can with paste; then again I haven’t had occasion to try it. (If you have, please let me know; I’d be much obliged ^_^)

But one thing I would warn beginners about is the lovely smell gel medium has (actually modelling paste doesn’t smell so great, either). I remembering driving my mom nuts with this smell, so make sure you work next to an open window or have enough ventilation.
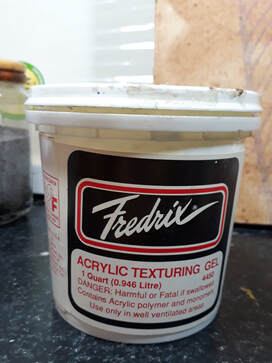
Finally, if coarse paste and gel still aren’t thick enough for you, you can try mixing plastic sand or similar texturing materials with your acrylic—and even with your paste or gel. Since these are all acrylic mediums, they all have adhesive properties, so you don’t have to worry about mixing glue in there with it or anything.
I have to say, I particularly enjoy mixing sand with the paint for the ‘crunchy’ feel and sound effects. (What can I say, I’m an abrasive person by nature ^^; ) Since you are actually mixing in something that isn’t acrylic this time, you really have to make sure you don’t mix too much sand so there’s more of it than the paint, to make sure the sand doesn’t come off.
Now the thing about mixing sand in with the paint is that depending on how much sand you use, the whole painting could end up really, literally heavy. You’ll want to make sure your support has enough, uh, support—like putting a solid plywood backing behind your canvas, for instance, instead of using a ‘beat-like-a-drum’ stretcher.
In any case, transporting your work afterwards might be a nice upper-body workout or something ^^ (But not nice for jillamonsters with weak wrists or torn shoulders ^___^)
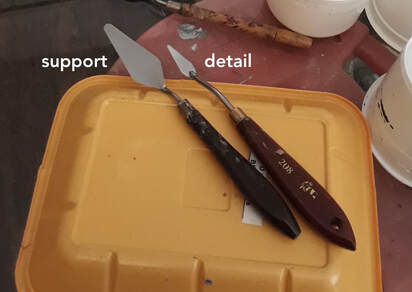
One last thing: sand can take its toll on even the best quality knives, as you can see in the before-and-after below (where the ‘before' / old knife is below):
 |  |
Felt kind of bad about that particular detail knife; I’d had it for many years and it had served me most faithfully—but yeah, I ended up having to buy its replacement (new knife above) just last year.
Knife Care and Maintenance
Having mentioned the ‘death’ of one of my favourite knives, let’s talk about how to take care of your knives so you can use them for like, forever. (Remember those first knives I got when I was 15?)
But as you’ve seen with ‘dead detail knife’ and its fellow fallen below, palette knives are not indestructible:
So the first order of business is to keep your knives clean. It used to drive me nuts when my students would let paint and such dry on their knives. Like brushes, the handle can get as filthy as you like, but keep the ferrule and the bristles clean—with knives, it’s the neck and the blade.
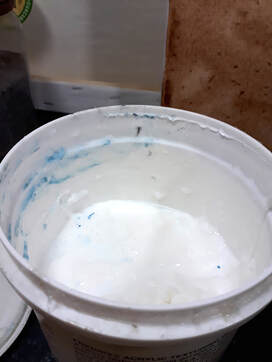
I mentioned ‘soaking’ your knives, earlier, like you would with a brush—which most probably isn’t recommended because of that whole rust thing. I have to admit I have seen rust come off in the water with some of my knives, before—but not all of them, so I guess it depends on that whole ‘stainless’ thing.

But if you should soak your knives, me, personally, I like to make sure that I never dunk them in the water past the hilt, so as to let water seep into where the neck enters the handle. That’s because any water that gets in there might rust the neck or the blade, or weaken the attachment, because it may not get to dry thoroughly.
Of course, that doesn’t justify soaking but I have to admit I’ve found it rather convenient. Of course, soaking in water doesn’t apply to regular oil paint (water-soluble oil paint, maybe, though). It’s a quick n’ easy fix for anything that might’ve dried on the blade that isn’t readily scraped off with another (clean) knife—especially if it’s something like gel or paste.
Finally, the best way to take care of your palette knives is to not use them for anything other than painting. That may seem rather obvious, but you’d be surprised—these poor dears were used (not by me) for rubber cement and epoxy (!):
 |  |
Don’t use palette knives to open tins (orange handled victim four photos back) (person who broke it didn’t even say sorry). And, don’t leave your knife lying around where it doesn’t belong (e.g. the floor), because if it should get bent—
—I regret to inform you that hammering won’t fix it. Okay, that last one was on me. Stupid of me, really. Well, what was I to do? And I had a hammer on me; I figured it was worth a shot.
See, that’s why I’m sharing these things with you—so you won’t make the same stoopid mistakes ^^; Anyway I still try to use that poor knife when I can—he can still mix things, but he’s not much good for scraping and he can be a tad tougher to clean.
Now, go forth and wield!
I hope this post has given you enough to get started on palette knife painting, which (even when used to produce monsters en masse in the painting factory) remains one of my all-time favourite painting methods. The colour, the texture, the materiality of the paint, the very process of applying it—it’s all just too much fun.
As always, I admit I don’t know everything there is to know about painting with palette knives, and I’m afraid all I can do is to share what I know from my own experience. But I would be more than happy to learn from you if you’ve got some palette knife know-how you’d like to share, or to help you out if I can if this poor attempt at a guide proved insufficient.
Just drop me a line here or poke me on Facebook or Instagram, and let’s continue our palette knife painting adventures, together.
2 Comments
Ma Norma V Zamora
10/15/2023 08:41:09 am
Hi Jill … I totally agree with you about the versatility of acrylic paint! I had to shy away from oil paint because of allergies. I also like your discourse on the palette knife! Will read on… thanks
Jill
10/15/2023 08:59:35 pm
Thank you so much for checking out my painting guide, Tita! I hope you found them helpful ~ happy painting! ^_^**
Leave a Reply.
Categories
All
Artist's Lifestyle
Conceptualisation
General Painting Tips
Jillabout
Painting Guides
Archives
June 2024
May 2024
April 2024
March 2024
February 2024
January 2024
December 2023
November 2023
October 2023
September 2023
August 2023
July 2023
June 2023
May 2023
April 2023
March 2023
February 2023
January 2023
December 2022
November 2022
October 2022
September 2022
August 2022
July 2022
June 2022
May 2022
April 2022
March 2022
February 2022
January 2022
December 2021
November 2021
October 2021
September 2021
August 2021
July 2021
June 2021
May 2021
April 2021
March 2021
February 2021
January 2021
December 2020
November 2020
October 2020
September 2020
August 2020
July 2020
June 2020
May 2020
April 2020
March 2020
February 2020
January 2020
December 2019
November 2019
October 2019
September 2019
August 2019
July 2019
June 2019
May 2019
April 2019
March 2019
February 2019
January 2019
December 2018
November 2018
October 2018
 RSS Feed